Image Classification Tutorial
Active Learning for a Drifting Image Classification Model
Imagine you're in charge of maintaining a model that classifies the action of people in photographs. Your model initially performs well in production, but its performance gradually degrades over time.
Phoenix helps you surface the reason for this regression by analyzing the embeddings representing each image. Your model was trained on crisp and high-resolution images, but as you'll discover, it's encountering blurred and noisy images in production that it can't correctly classify.
In this tutorial, you will:
- Download curated datasets of embeddings and predictions
- Define a schema to describe the format of your data
- Launch Phoenix to visually explore your embeddings
- Investigate problematic clusters
- Export problematic production data for labeling and fine-tuning
Let's get started!
Install Dependencies and Import Libraries
Install Phoenix.
Import libraries.
Download and Inspect the Data
Download production and training image data containing photographs of people performing various actions (sleeping, eating, running, etc.).
View a few training data points.
The columns of the dataframe are:
- prediction_id: a unique identifier for each data point
- prediction_ts: the Unix timestamps of your predictions
- url: a link to the image data
- image_vector: the embedding vectors representing each image
- actual_action: the ground truth for each image
- predicted_action: the predicted class for the image
View a few production data points.
Notice that the production data is missing ground truth, i.e., has no "actual_action" column.
Display a few images alongside their predicted and actual labels.
Launch Phoenix
Define a schema to tell Phoenix what the columns of your training dataframe represent (features, predictions, actuals, tags, embeddings, etc.). See the docs for guides on how to define your own schema and API reference on phoenix.Schema and phoenix.EmbeddingColumnNames.
The schema for your production data is the same, except it does not have an actual label column.
Create Phoenix datasets that wrap your dataframes with schemas that describe them.
Launch Phoenix. Follow the instructions in the UI to open the Phoenix UI.
Find and Export Problematic Clusters
Click on "image_embedding" in the "Embeddings" section.
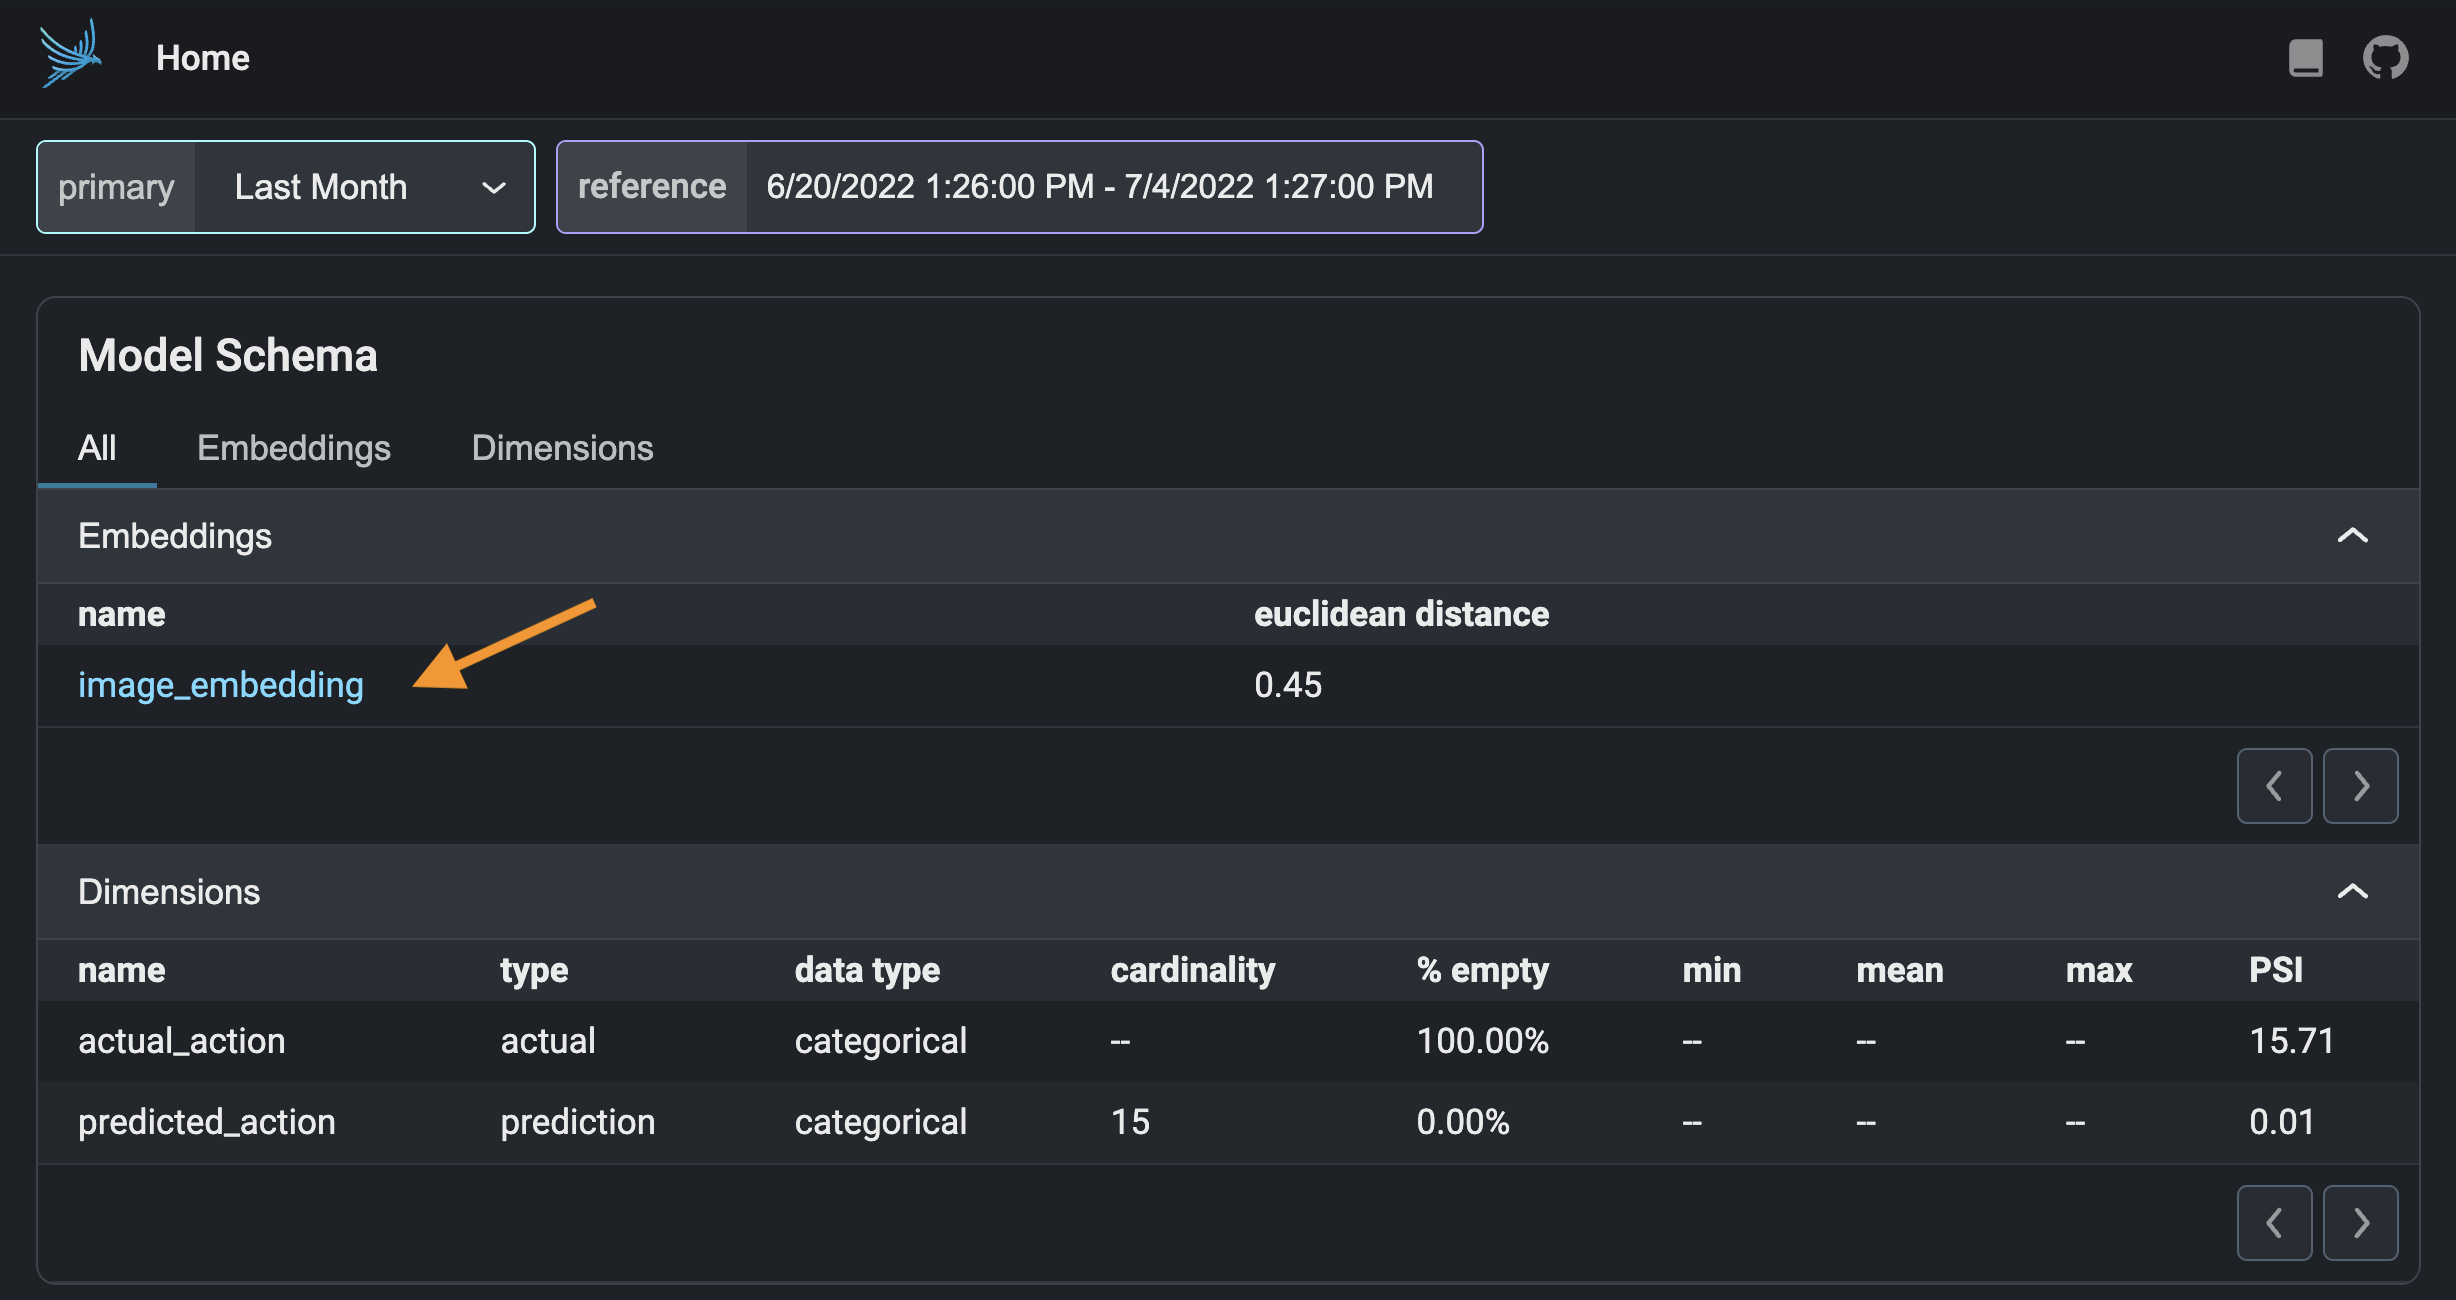
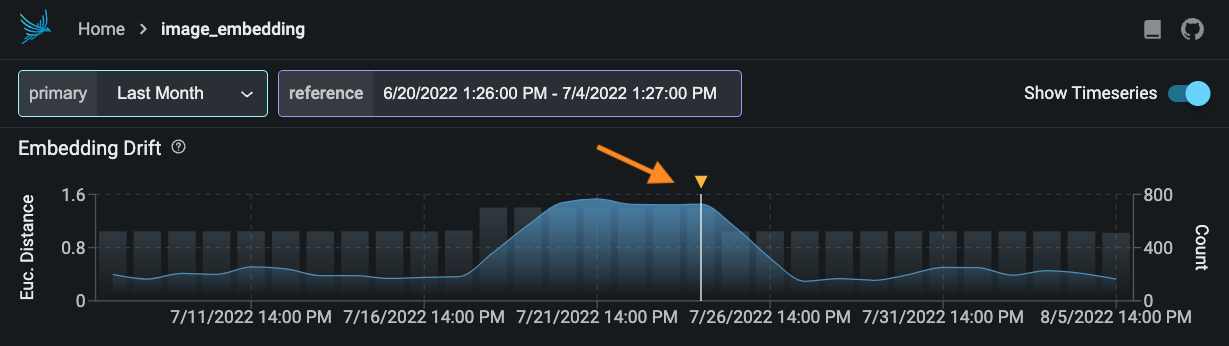
Select a period of high drift in the Euclidean distance graph at the top.
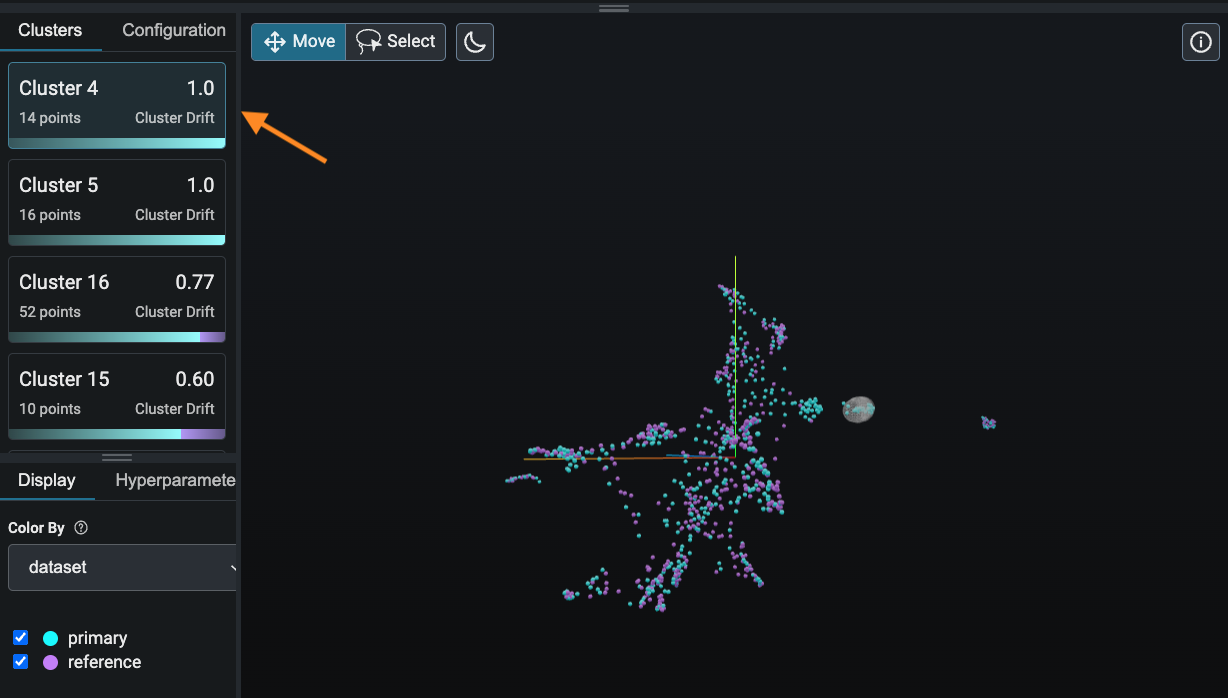
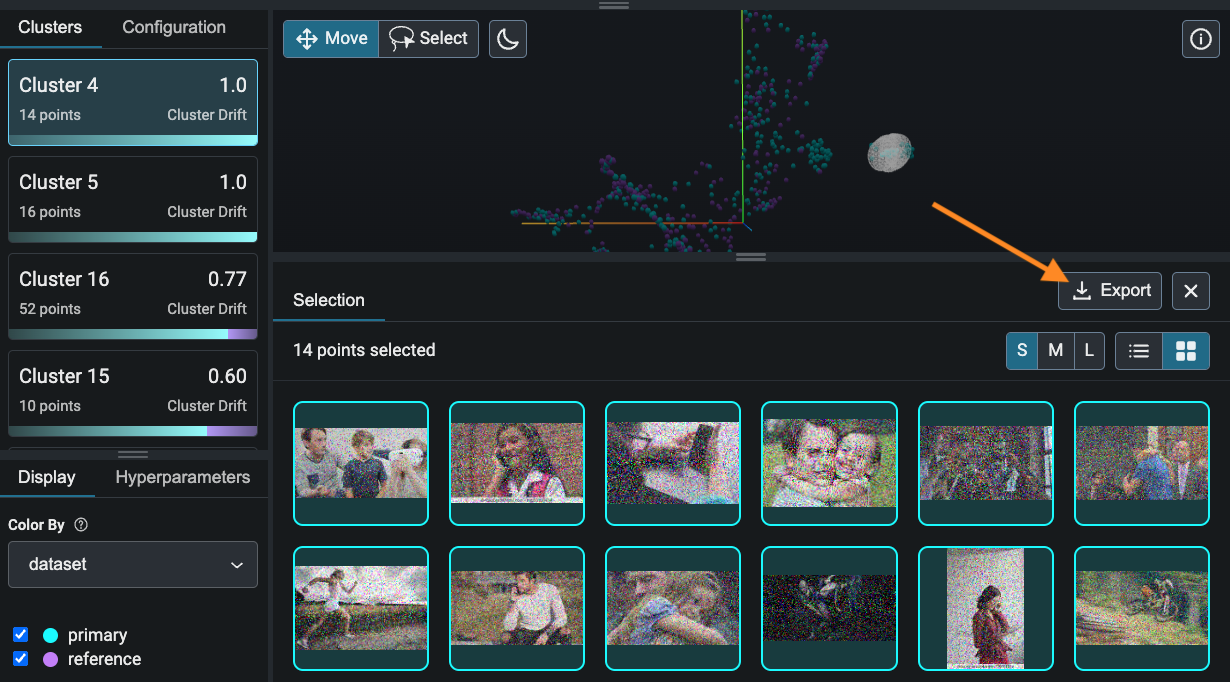
Click on the top cluster in the panel on the left. Phoenix has identified this cluster as problematic because it consists entirely or almost entirely of production data, meaning that your model is making production inferences on data the likes of which it never saw during training.
Use the panel at the bottom to examine the data points in this cluster. What do you notice about these data points that is different from the training data points you saw earlier?
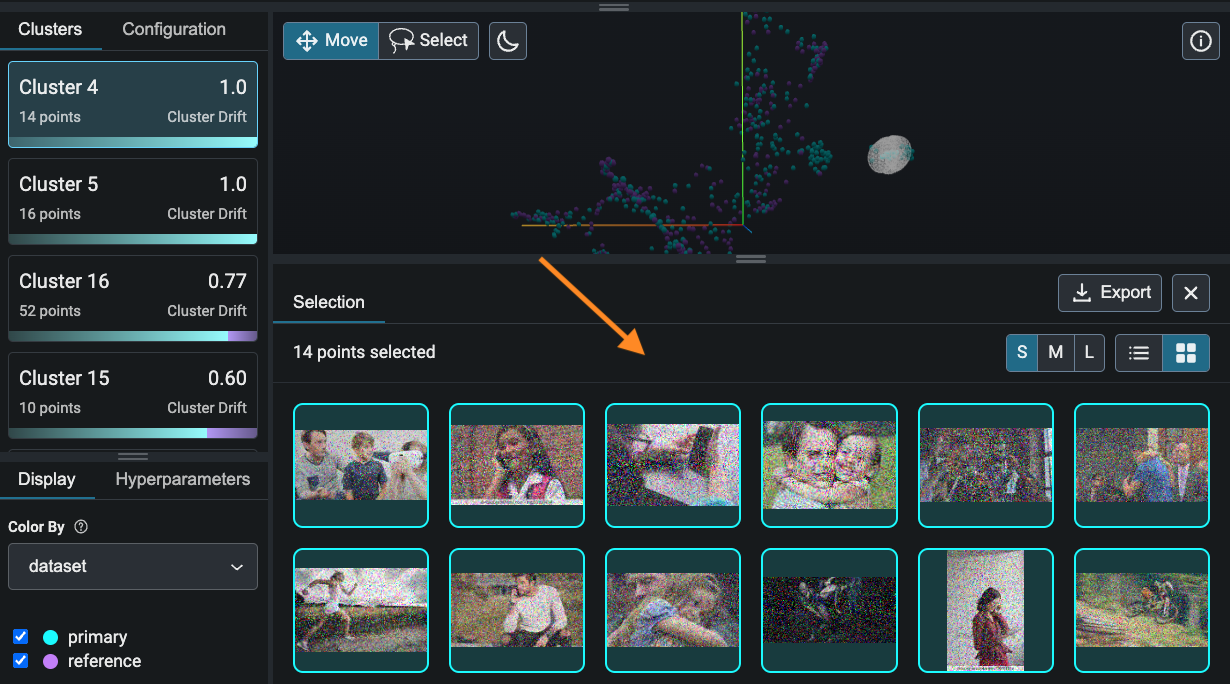
The data points in the cluster above are grainy and noisy. Click on the "Export" button to save your cluster for relabeling and fine-tuning.
Load and View Exported Data
View the exported cluster as a dataframe in your notebook.
Display a few examples from your exported data.
Congrats! You've pinpointed the blurry or noisy images that are hurting your model's performance in production. As an actionable next step, you can label your exported production data and fine-tune your model to improve performance.